Showing posts with label Black Garlic. Show all posts

Saturday, January 5, 2013

Garlic Amino Salt

Taking a cue from Chalt, I decided that I should like to make an amino heavy salt. I have previously been led to believe that the flavor advantage of sea salt, particularly highly regarded sea salts such as sel gris, fleur de sel and varied other examples, is the mineral and amino content imparted by the brine from which it is collected. My intention in this case was to create a reduced salt with far-increased amino content, intended to be used in a similar way to soy sauce, but without the addition of liquid. I'm calling this salt "Garlic Amino Salt", as its ingredients are sea salt, alderwood smoked salt, black garlic powder and minced preserved garlic.


As this is a small-batch experimental recipe, I started by adding 250 mL of Spring Water to a medium saucepan over high heat. Once the water started boiling, I reduced the temperature to medium, and added 50g of an ordinary, mid-price Sea Salt.


I then began attempting to super-saturate the solution with sea salt. After adding 25g more salt, I discovered that the solution was too thick, and added 100mL more water. The solution at that point seemed too thin. I then added 3g of smoked salt and 5g of sea salt, and started adding water in 15mL increments. After 5 such increments, I decided that the solution was appropriately dilute as to be supersaturated at boiling. I then added the black garlic and minced garlic, boiled for 2 minutes more, and poured the mixture through a plastic filter I purchased online into a 2.2qt Pyrex baking dish. It was then placed in an oven at 275F, as shown.


I checked the solution at 15 minute intervals, observing the drying taking place from the outer rim of the dish inward, as illustrated in the following sequence. Note that significant precipitation happened in the first 15 minutes of the process.


After 90 minutes of such, I found that the solution had dried into a loose cake. I removed the dish from the oven and stirred it using a silicon spatula. The resulting aggregate was semi-moist, with pockets of completely dry salt interspersed. I decided that the mixture could use more drying and placed it back in the oven for another 30 minutes.


At this time, I removed the salt from the oven and stirred it up once again. It had become dry throughout, excepting a few small, moist clusters that nonetheless crumbled between my fingers. Tasting the new salt, it was intensely savory, with a significant but far-reduced saltiness from the original sea salt. I think it would work well as a salt replacement at anywhere from 1:1 to 1:2.5, for any recipe that the cook wanted to make more savory and wouldn't mind including black garlic flavor.
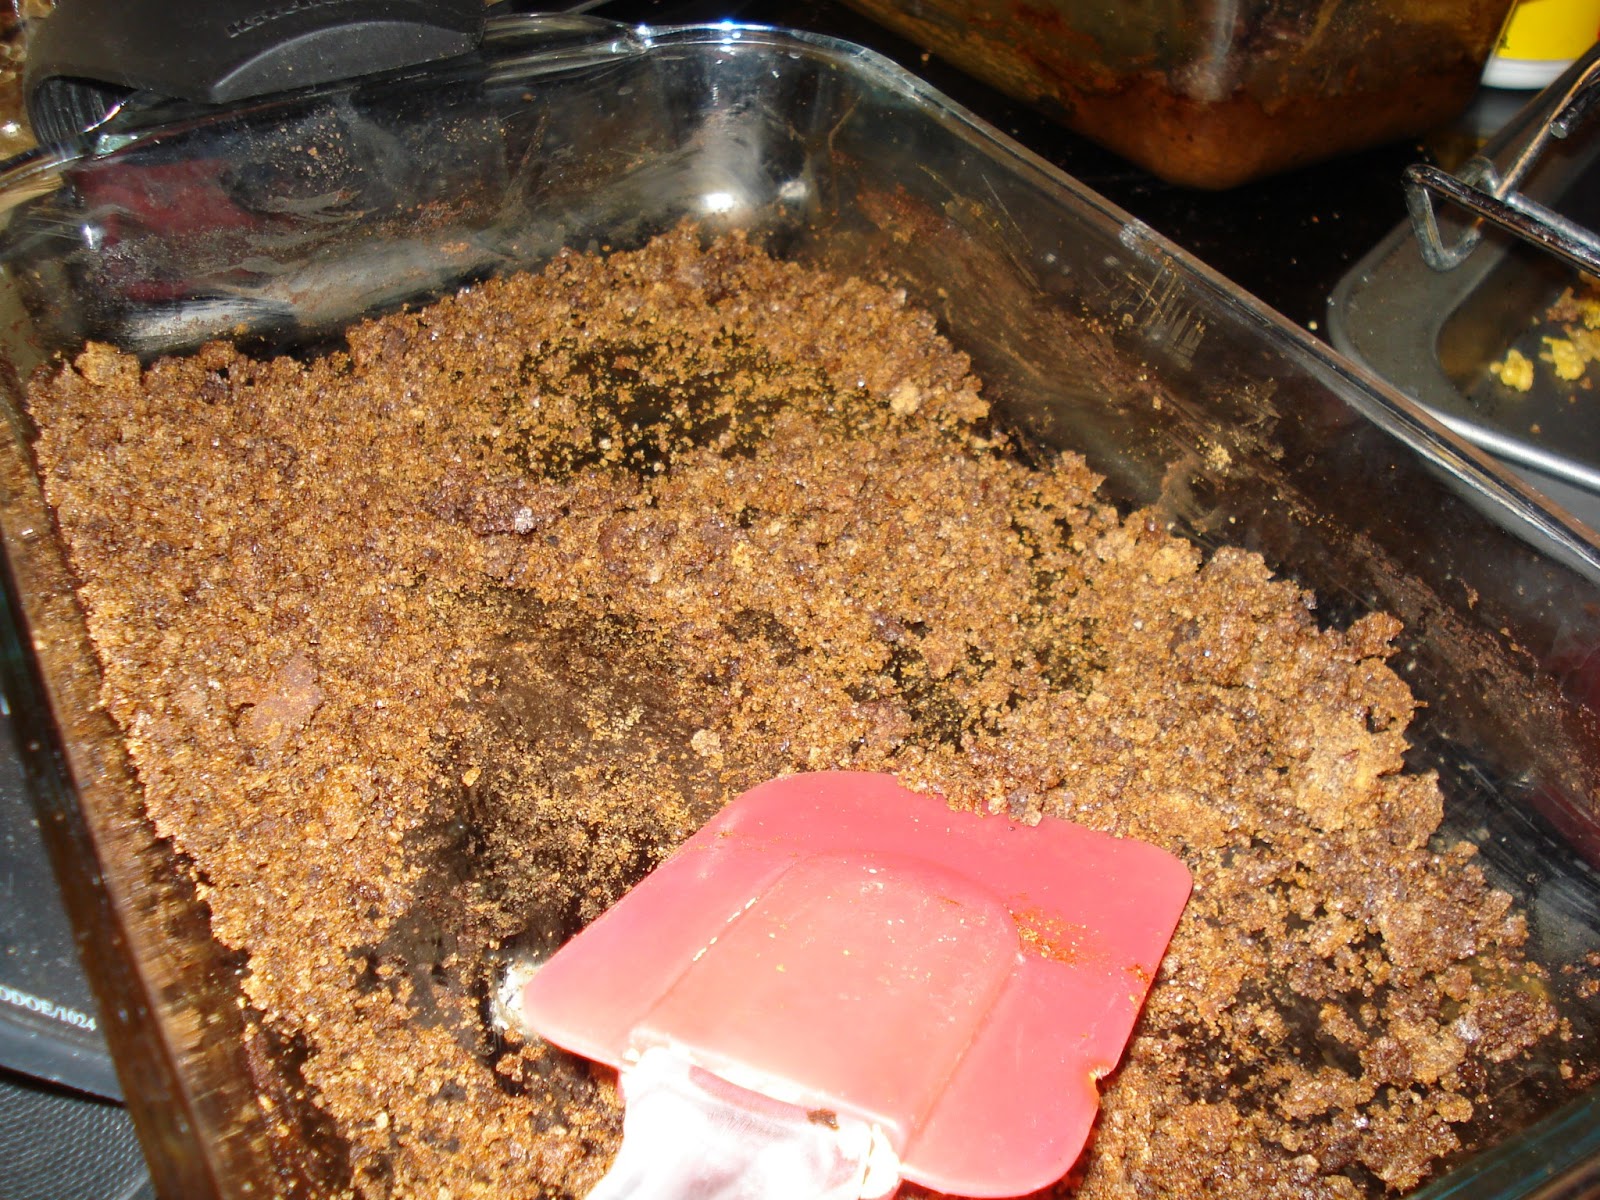


I believe this recipe would be helped by the inclusion of a vacuum hood for the reduction of the salt, coupled with a significant reduction in drying temperature. When using a vacuum hood, however, I would double the black garlic content and remove all minced garlic. The inclusion of some (5g on the light side to 15g on the heavy side) dried roasted garlic would be preferable to minced garlic in this case.

This experiment had an unexpected but not altogether unwelcome side effect. On a first attempt, I accidentally added the garlic and black garlic early, and decided I should start over. Not wanting to waste perfectly good black garlic, I put the failed recipe in a Pyrex loaf dish in the oven, without filtering, and the garlic mixture reduced down to a thick paste. I intend to put it in a yet undetermined amount of olive or canola oil, and use the result as a cooking paste or condiment.

Experimental data was transcribed to a text file, available on Google Drive.

Tuesday, December 4, 2012

Black Garlic Sauce Update

Since my buddy was in town for the weekend, and I was sending some of the sauce back with him, I went ahead and further processed the sauce. I added some onion powder, garlic powder, black pepper, dried mushrooms and anchovy paste, and then used a hand blender to puree the mixture. After blending, I let it sit for a couple of hours, at which time the mixture had gotten smoother and sludgy. I added 1/2 C of good Fish Sauce, 1/2 C of passable Dark Soy Sauce, and a further 1/2 cup of Michiu. I intend to give the sauce about a month to age, at which point I will see how it has turned out.


If you noticed that the level should be higher, that's because it should be. I sent my buddy back with about 10 oz. of the sauce in a Topo Chico bottle, which he has been instructed to cover with foil instead of the cap with which I sealed it.

Saturday, December 1, 2012

The Black Garlic Oven Post

Today, I harvested my last batch of black garlic and, having pre-harvested one head and having taken four for the sauce base, processed the last seven heads, cutting half up to dry for making black garlic powder. The remaining half will be used at-will for recipes, etc., with some going to a buddy of mine. I've also started a new batch for next month, which I'll cover later in this post. First, I'd like to explain how I made my light bulb powered black garlic oven, using the Huskee Tough Guy EPS (expanded polystyrene) cooler, as somewhat pictured below.


Expanded polystyrene is recommended for applications below 160 degrees Fahrenheit, with this one coming in about 10 degrees below that mark. I started by covering the walls with aluminum foil, reflective side inward-facing, securing it with normal Elmer's Glue-All. I then drilled a 1/2" hole in the bottom center of the container, through which to pass the wires for the light bulb. The tiles were positioned in a diamond shape in the bottom, as depicted here:


The tiles have small felt feet on them in the form of a flattened "X", with top and bottom one inch in from the edge of the tiles. This keeps them from scratching the aluminum foil, while providing a solid base upon which to place ball jars, with enclosed garlic. While I have used ball jar canning lids in the past, I have decided to switch to aluminum foil as the exclusive lid, as it doesn't need to be a perfect seal and I'm concerned about the BPA content of the canning lids. I have placed the reflective side up, as below:


Note the stone filled jars from the last post. They provide IR absorption and thermal mass for the system. As a strongly IR absorbing material, stone also emits IR, bolstered and buffered by the high specific heat of the water. In my other experiences with fermentation, I have understood that light exposure can be detrimental to the fermentation process. Googling "Light effect on fermentation" seems to provide a number of articles, blog entries, &c. that suggest that both visible light and UV radiation can have a negative effect on fermentation. I genuinely don't know if they apply at 140°F-150°F--a perceived consensus indicates this range for black garlic (per this instructable and this make article)--but this mitigates the issue, while the dry heat resists mold and non-beneficial bacterial growth.

Each head is placed in an individual 8 oz. ball mason jar. Some of those that I have are normal and some are quilted, but I don't think it really matters which one is used, save the utility of having the measurements on the side of the normal ball jar. I leave the heads sealed in the jars for 30 days, at which time I remove the lids and let the garlic dry. This results in cloves that are dark, textures and have shrunk away from the skins of the garlic. Some in the last batch were drier than others, with some reducing to a powder when pinched between the fingers, while others were leathery and pliable. The harder examples were cut up and reserved for additional drying, for making black garlic powder.

To measure temperature, I punched a hole in the side of the cooler using a small meat thermometer, calibrated in boiling water (e.g. This Taylor product) around the middle of the height of the jars. Using this to monitor temperature, I used a number of different light bulb wattages.


 I found that I had to use 40W bulbs during higher Central Texas summer garage temperatures, and a 30W bulb during lower temperatures. The incandescent bulb needed will vary by ambient temperature, but I would wager that 40W is a reasonable base starting point for most room temperatures. I conducted primary research with a nominal quantity of water in the system (and no garlic) monitored by a webcam. I will provide the records from this experimentation in an update to this post.

For reference, I used a ceramic light socket I got from a cheap lamp I bought from Lowe's hardware store. There is one very near my home, and I found that they have ad hoc porcelain light sockets for between $3 and $4. I used a cord from another, broken appliance, and soldered some fork/U-shaped terminal connectors to the end of its wires. I bought the cooler at Academy, and I can't easily find the price, though I believe it was no higher than $30. Altogether, I remember calculating (some time ago) that the apparatus, plus electricity, with initial cost of garlic was less than the cost of twelve heads of black garlic online. For the record, this is an excellent use of incandescent light bulbs, as they put off far more heat and IR radiation than light. In the month it takes to do this, the oven costs on the order of $5-$8 per batch, including electricity and garlic, but not including the cost of manufacture.

Friday, November 30, 2012

Black Garlic Sauce Base

Early this morning, I chopped up some black garlic into a mix of 1 cup of Kikkoman light soy sauce and and 1/2 cup of Michiu, as seen below.


I used four heads' worth of black garlic cloves in the sauce. My intention is to store the sauce in the refrigerator for a week, and then blend up the sauce base, while adding some onion, garlic, anchovies, dark soy sauce, fish sauce and (possibly) ginger. I plan to then store the sauce in a sealed container in the refrigerator for a further few weeks, at which time I will test the sauce to see how it tastes. 

The sauce is meant as a cooking ingredient or base for another sauce. I fully expect that it will impart significant savoriness, or umami, to the dishes in which it is added. 

I also put some rocks in jars tonight. In my current black garlic oven, I have four pint jars full of water between the light bulb and the garlic, to provide the system with some thermal mass.  In thinking that I'd rather the heat be a little more even, I reckoned that stone absorbs IR radiation, so the addition of rocks with  water should deliver more even heat throughout the oven while protecting the garlic from direct light. The jars are pictured below.


I'll next post a detailed guide to the structure and setup of the black garlic oven, when I load it with garlic this Saturday, following the harvest of the black garlic currently finishing its drying process.

Thursday, November 29, 2012

Intro and Black Garlic December Harvest

I'm starting this blog as a record of my hobbies. As a DIY enthusiast, I have a number of esoteric interests. I'm going to use this as a way to publicly record my pursuits, and as a basic host for various guides and project details.


That said, I have a December 1st harvest date for the most recent batch of black garlic from my cooler and light bulb based black garlic oven. The above picture is a pre-harvest sample that I took (after mistakenly believing this Wednesday to be my harvest date), including some unpeeled cloves from near the middle of a head, and the peeled cloves from the outside of the head. They have a good texture, and the aroma is great.

While I'll be posting the details for my extremely cheap DIY black garlic oven at a later date, my basic process is pretty simple. I keep the garlic in the oven for 30 days between 140°F and 150°F , adjusting the light bulb used as the outside temperature changes. At 30 days, I remove the lid for the jars the garlic is aged in, to allow for the final drying of the heads, which takes 10 days. My roommate has had the idea of using a higher wattage bulb (probably 60W) in combination with a lower wattage bulb (maybe 30W or 40W, depending on ambient temperature) for heating and maintaining, respectively. The two would be hooked up to a relay, controlled by a circuit with at least one thermocouple as its input.

I plan to chop and dry about four of the heads, after which I'll make black garlic powder. Another four will be soaked in some light soy sauce and blended up with some dark soy and fish sauce, to be used for cooking. The last four will be used as-is. I'll be making 24 heads in the next batch, instead of the 12 that I made in this batch, some of which I'll use in a tomato-based fermented sauce. I might further double up the capacity, since I think the cooler could be more densely packed and work well.